Introduction to Strapi and Next.js
In the rapidly evolving world of web development, creating scalable and performant applications is more important than ever. Developers are constantly searching for tools that not only streamline the development process but also provide flexibility and power to build robust applications. This is where Strapi and Next.js come into play.
Strapi is an open-source headless CMS that allows developers to manage content through a user-friendly interface while delivering it via a fully customizable API. Its flexibility enables seamless integration with any front-end framework, making it an ideal choice for modern web applications.
On the other hand, Next.js is a React-based framework that excels in server-side rendering (SSR), static site generation (SSG), and client-side rendering (CSR). Its powerful features, such as built-in routing, API routes, and image optimization, make it a go-to solution for building high-performance, SEO-friendly websites.
Together, Strapi and Next.js offer a potent combination for building full-stack applications that are not only efficient but also scalable. In this article, we’ll explore how these two technologies work together to create a seamless development experience, allowing you to build applications that are both powerful and flexible.
Building a Blog with Strapi and Next.js
The aim is to create a blog website where you can easily manage and publish content using Strapi, while delivering a fast and optimized front-end experience with Next.js. To achieve this we will need to,
- Setup Strapi for Content Management
- Install Strapi in Local
- Define Content Types
- Create and Manage Content
- Connect Next.js to Fetch and Display Content
- Fetch Blog Posts and List them in a Page
- Dynamic Routing for Blog Posts
- Design the Blog Single Page
- Deploy backend and frontend
- Deploy Strapi
- Deploy js
Setup Strapi for Content Management
Install Strapi in Local
For Strapi local installation, the requirements are,
- Node.js: Only Active LTS or Maintenance LTS versions are supported (currently v18 and v20). Odd-number releases of Node, known as “current” versions of Node.js, are not supported (e.g. v19, v21).
- Your preferred Node.js package manager:
- npm (v6 and above)
- yarn
- Python (if using SQLite database)
You will also need to install git and to have a GitHub account to deploy your project to Strapi Cloud.
To create a new Strapi project, run the installation script “npx create-strapi-app@latest blog-admin –quickstart”. Running the installation script with the “–quickstart” option simplifies the process by automatically setting up Strapi with SQLite database.
However, to use a different database, omit the “–quickstart” option and select the desired database type during installation.
During installation we might be asked to login to Strapi Cloud or skip the step. If we do not choose skip, a browser window will open asking to login or signup to Strapi.
After the installation is complete, accessing “localhost:1337/admin” in web browser will lead to the administration panel of Strapi project. From there, the first essential task is to register a local administration user, who will be saved with Super Admin privileges. Once registered, you’ll gain access to the administration panel, where you can start managing your Strapi project’s content and settings.
Define Content Types
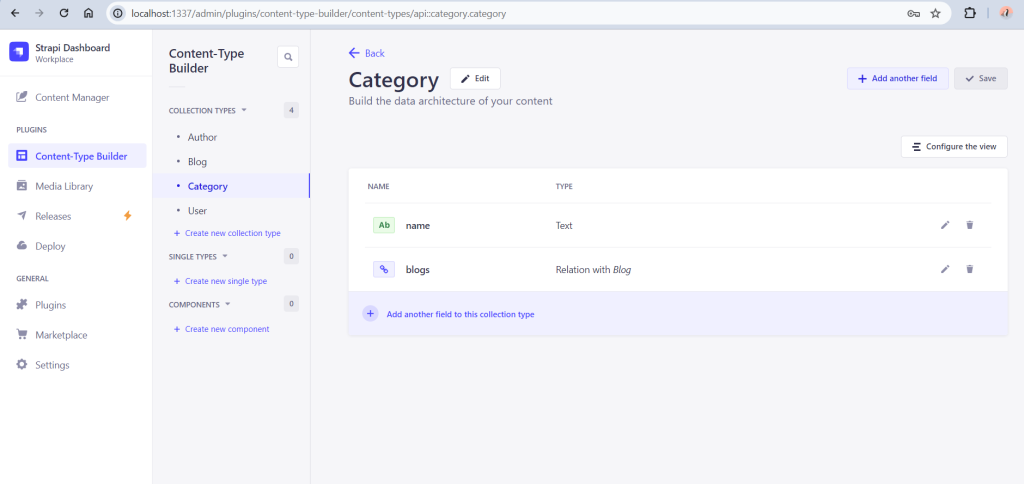
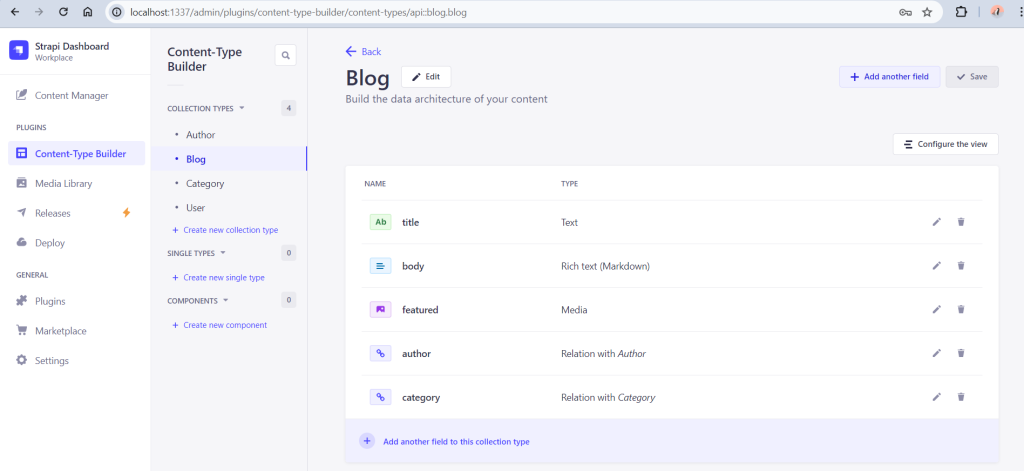
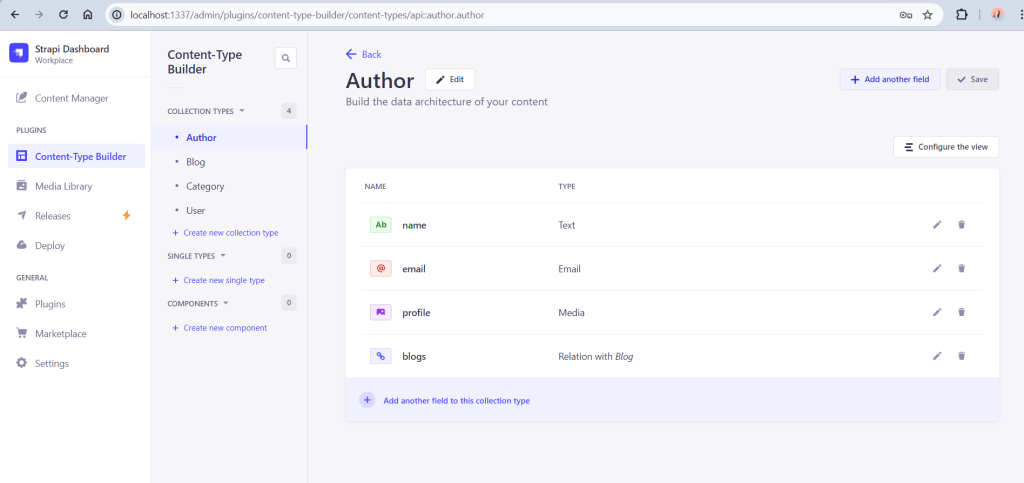
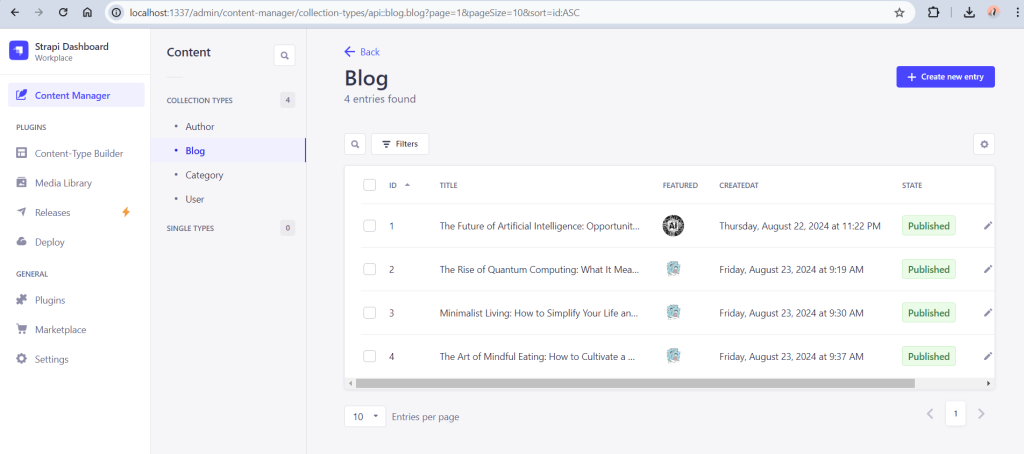
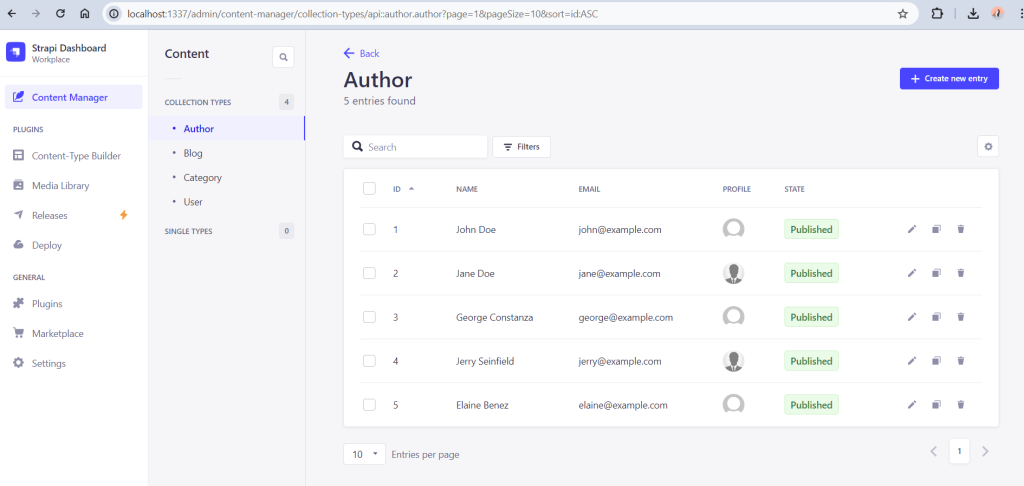
For the blog website’s backend, we need to define three content types: Blog, Category, and Author. In Strapi, there are three types of content structures: Collection Types, Single Types, and Components. The decision to create a Collection Type or a Single Type depends on the number of entries we plan to have for a particular content type. Components, on the other hand, are reusable sets of fields that can be used within Collection or Single Types.
For our Blog, we need to create Blog, Category, and Author as Collection Types. These Collection Types can be linked using the relation field. After defining the necessary fields, our content types would look somewhat like the images below.
Create and Manage Content
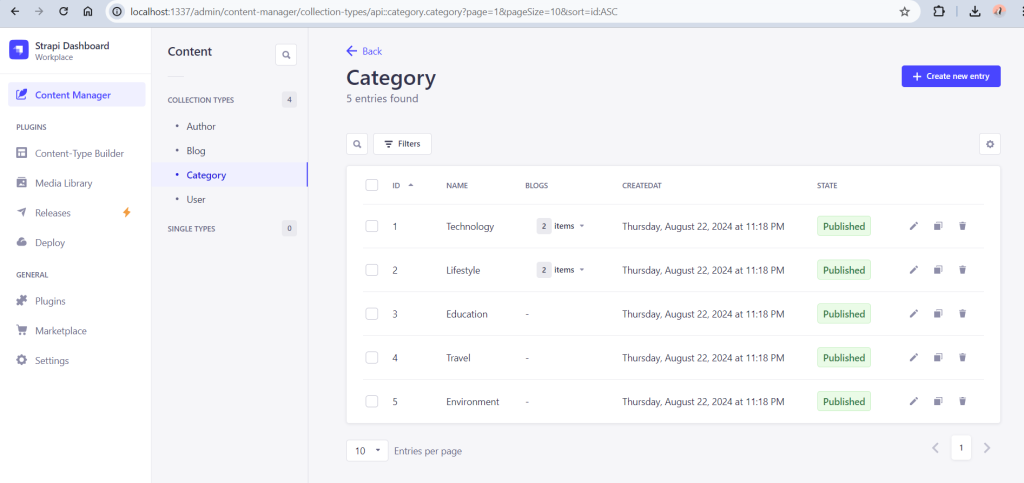
After defining the content types for the blog website, we can add content through the Content Manager in the Strapi administration panel. Both the Content Type Builder and Content Manager are default plugins in Strapi, and they come preinstalled when we set up a Strapi app. In the Content Manager, we can proceed to add entries for the Collection Types—Author, Category, and Blog.
After adding the required content, we have to add permission in Settings > USERS & PERMISSIONS PLUGIN > Roles. For Public role, under Permissions, add find and findOne permissions for Category, Author and Blog content types.
Connect Next.js to Fetch and Display Content
Create a Next app using the command “npx create-next-app blog-frontend”. We will be asked for the configurations for the next app, choose the configurations as required.
After creating the next app, inside the project folder, add the required dependencies. To make http requests, we can add axios. We can add axios to the project using the command ‘npm install axios’. Then start the next app by running ‘npm run dev’. This starts the next app in ‘localhost:3000’.
Fetch Blog Posts and List them in a Page
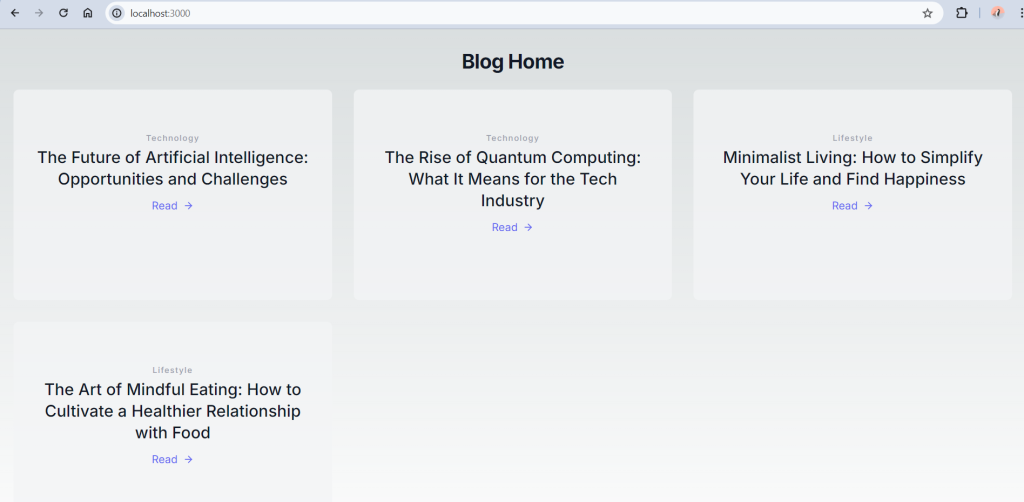
To fetch blogs along with their associated ‘Author’ and ‘Category’, we can use Strapi’s REST API within the Next.js app. On the home page of the Next.js app, we can list the blogs using Axios. Since the App Router was chosen during installation, the home page is located in src/App/page.js. For styling, we can use Tailwind CSS, which was selected during setup. Tailwind provides blocks and sample templates that are useful for designing websites with Tailwind CSS.
Dynamic Routing for Blog Posts
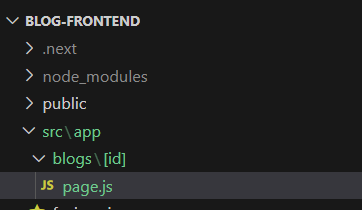
Using the App Router in Next.js, we can create dynamic routing in the app directory by using parameters such as a blog’s slug or id. If we choose to use the id for dynamic routing, the folder structure in the app directory would look like this:
In this structure, [id] is a dynamic segment of the URL that matches the blog id, allowing us to create routes that correspond to individual blog entries.
Design the Blog Single Page
To create the blog single page, use the page.js file in the dynamic routing folder to retrieve individual blog content. We can use axios to fetch the blog data using the blog’s id, which is provided as a parameter in page.js.
When rendering images in a Next.js app, we need to configure the hostname of the image in next.config.mjs to ensure proper loading. This configuration helps Next.js handle external images correctly.
Deploy backend and frontend
Deploying a full-stack application involves setting up your backend and frontend on separate or integrated hosting platforms. Strapi, a headless CMS, will handle the content management, while Next.js will serve as the front-end framework.
Deploy Strapi
There are several hosting providers available for Strapi like Heroku, DigitalOcean, AWS, Render etc. Strapi also provides its own cloud service to host applications.
To deploy in Strapi Cloud, create a strapi cloud account and login in to the account. Create a new project, choose a plan and add git repository. In Setup, add general information regarding the project. Each time there is a commit to the selected branch of the repository, strapi will automatically deploy the project by default. We can also choose to turn off the feature.
After deployment completed, the Strapi app would load with admin login interface at first. After registering the admin, the dashboard would be loaded. The content types we created in our local instance will be present in Content Type Builder. Since the app is in production mode, we cannot add more content types. Content can be managed in Content Manager.
Deploy Next.js
Next.js apps can be deployed on various hosting platforms, including Vercel, Netlify, DigitalOcean, and AWS. To deploy your app on Vercel, start by logging into your Vercel account. You can log in using your Git repository credentials and then select the Git repository containing your frontend Next.js code.
In the local environment, create the build files using the command ‘npm run build’. Make sure to update the API URL in your Next.js app to point to the deployed Strapi app’s URL.
Once you’ve selected the repository to deploy on Vercel, add any necessary environment variables in the Vercel dashboard under “Project Settings”. Vercel automatically deploys your project after each push to the main branch, but you can also trigger deployments manually. Vercel supports both preview deployments (for testing pull requests) and production deployments (for the live site), making it easy to manage different environments.
References
https://docs.strapi.io/dev-docs/quick-start
https://docs.strapi.io/dev-docs/integrations/next-js


